As I would like to represent this vehicle in a late 1944 ETO setting the wet and damp conditions I plan to use a darker coloured pin wash to lift the contrast to the monochrome base coat. More vibrant colours will be added by way of the accessories in the load area.


I’ve never attempted a muddy finish on an AFV so this is going to involve a fair amount of trial and error. Watching a few videos and taking inspiration from the guys that like to build vehicles set in eastern European theatres, it was clear that to pull this off I would have to step carefully.
My first choice was to decide what materials I would use. The AK acrylic textured weathering mud is a product I like and their dark mud in particular is quite a nice authentic tone out of the pot. It would fit perfectly into my late Autumn 44 Belgium border setting. It is also water based so easy to clean up if I take things a little too far!
The first steps are to add some texture and looking at real muddy vehicle images the wheels at the rear seem to pick up most of the track dirt that is kicked up and propelled over the upper track run. With this in mind I decided I would leave some wheels cleaner than others.
To get my eye in I started with the underside of the cargo platform. I could experiment with both quantities and the positioning of the product without worrying too much, as only a fraction of these areas will be visible.

Once the acrylic mud had dried, I used AK dark mud enamel and blended them in with white spirit. This product was a fair bit lighter that their acrylic mud colour, so I went back over selected areas with the acrylic mud thinned with tap water. Much like when weathering tracks I also used the speckling technique, using AK enamels with a small amount of MIG dark mud pigments to add some texture. This all looks very messy at first, so I let it dry up and started work on the tracks and wheels.

The tracks were first primed with Tamiya Fine Surface Primer grey and then base coated in MRP-034 tank grey. I then randomly washed on, and then speckled my pre-mixed Tamiya acrylic rain wash. Once dry an application of AK acrylic texture mud and sea grass was randomly added, smoothing over the cleats trapping the mud in between, so I didn’t get too much build up.

The
main
running wheels received far less overall mud texture and I favoured just
adding
it to selected areas. Learning from my efforts on the underside of the
loadbed the effects were added in stages, slowly building up the layers.
First a random application of light mud textured paste and
after it was allowed to dry, dark mud texture was added. Once dry this was
followed by blending in some AK enamel dark mud thinned with white
spirit.
Early stages of mud application

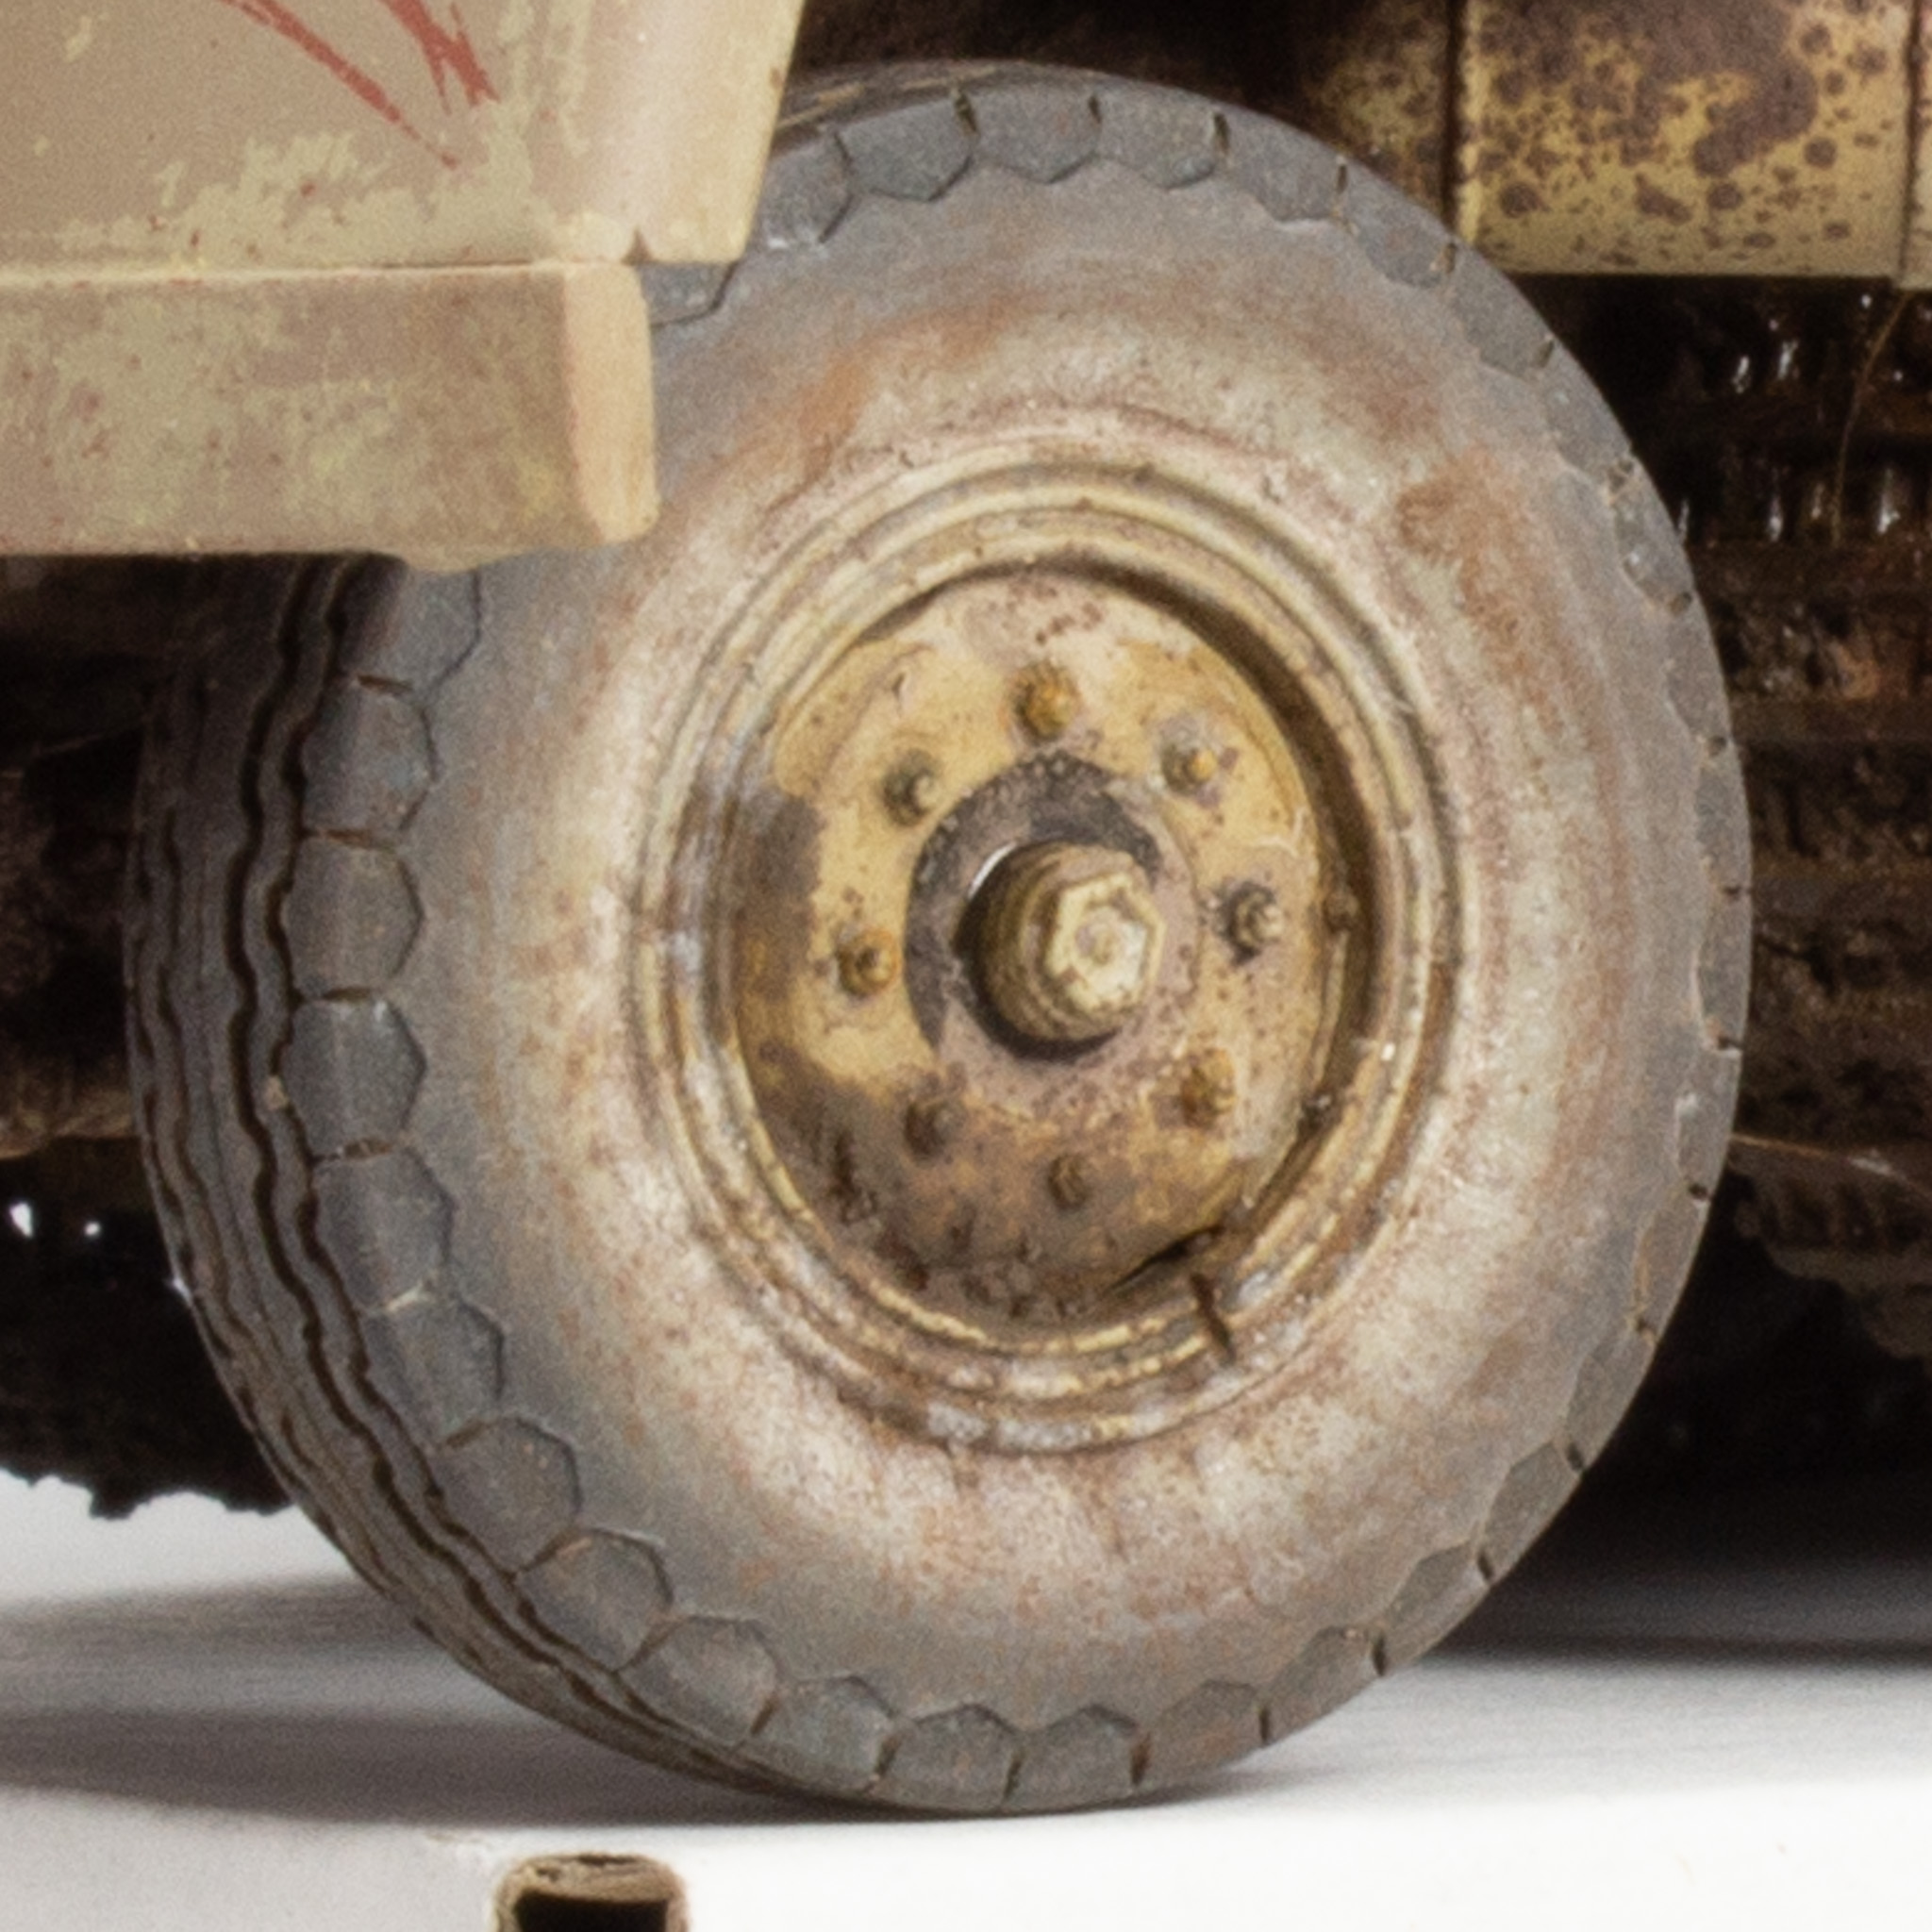
The front wheels received a slightly reserved first application.

The sprockets with a heavier build up of AK textured acrylic
mud between the spokes.

The next step involved adding speckles of mud to the wheels. A mixture of AK dark mud splatters and MIG dark mud pigments were mixed together and applied with a cocktail stick and brush. Keeping the effect random was my aim. You can either resort to masking off certain areas, or rely on constantly cleaning up with fresh water.
This is the first round with
two slight variations on the dark mud tone and one lighter one.


The sprockets and idlers with clumps of AK textured acrylic mud between the spokes.


The next round of both speckling and mapping will need to be more precise. I will also mix some oil paints to highlight raised detail and claw back some definition. This will also involve adding some grease and oil stains to the hubs.

Beginning where
we left off, I first tidied up any rough areas on the chassis legs so the
running gear could be fitted. Before any more weathering could begin the wheels
and tracks had to be fitted. I had used the kit individual links, and they were
a little tricky to build around the wheels and still be kept in sections for
painting. In hindsight it would also
have been easier to fix all the swing arms to the chassis minus just the outer wheels. If I ever build another a set of Friul metal tracks will be a better option too!
Before the kit tracks were fitted, I added graphite to both inner portions and sprocket teeth to simulate where metal-to-metal contact is made. A silicone sculpting tool helped safely and smoothly spread the graphite along the runs and onto both sides of the track teeth. As my swing arms and wheels had still to be fixed, I had to both line these up straight on the chassis and also ensure the tracks lined up as they had pre-paint. This is never guaranteed, and they both put up quite a fight! I ended up using CA glue on the tracks and the fit to one of the sprockets, and over one of the idlers wasn’t ideal. I will likely look at improving these at a later stage. On the plus side having so much mud around the running gear means it was much easier to blend over all the attachment points.


The front wheels received additional enamel washes. Pigments and oil paints should round off the desired effect in a future step.

Now the running gear was attached I adding further weathering to start harmonising the overall effect. Each wheel was dealt with separately, tidying up any overscale effects and adding more oil and grease effects with enamels. The AK texture mud was used again but in minute quantities just to blend in areas that required a little improvement. As I was conscious of how fragile the track runs were I stuck to pigments and kept the washes to acrylics only.


No comments:
Post a Comment