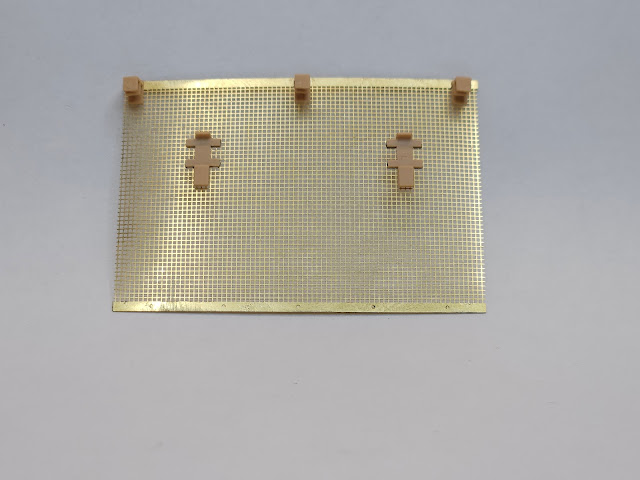
Construction of the Drathgelflechtschurzen (mesh space armour).
In addition to fitting the spaced armour the kit provides parts so you can build it up without the tubular rails altogether. By simply adding blanking plates to the upper hull. To replicate this option accurately you would really have to drill lots of very small holes in the track guard side profiles where the lower brackets would have attached. That will involve a very fine drill and a very steady hand!
The tubular top rails provided only come with cut-outs to attach the spaced armour panels. Unlike the excellent Dragon Ausf J kit #6575 there are no additional tubular rails offered without any cut-outs. This would allow you to display the rail without the spaced armour panels. If you wanted to display the odd panel missing you would have to fill appropriate cut-outs. I notice RFM in one of their CAD images simple show the brackets attached to the rail where a central spaced armour panel is missing which is a little strange. In reality the bracket was welded or bolted to the rear of the spaced armour panel and clipped and bolted over the rail.
The upper brackets connect the tubular rail to the rear of the panels. The lower brackets connect the rear of the panel to the track guards. These lower brackets are in two parts to allow for two fitment options. This was to enable the use of wider Winterketten/Ostketten tracks. The upper rail brackets are in one part and have two fixed positions, whereas the track guard brackets had to be adjusted to sit further out to accept the wider track type. The outer portion of the bracket needed to be positioned horizontally to clear the wider track type. In step 17 these are only shown fitted in the vertical position to accept the regular tracks included in the kit. The real bracket was hinged but you need to decide which option you want beforehand (unless you fancy drilling and pinning all eight brackets!)
Track guard brackets postioned for wider tracks
The middle spaced armour panel looks a little out of alignment in the pic below, but that is due to the rails being dry fitted to the hull.
Rather than attaching the tubular rail brackets to the upper hull as instructed, I employed a similar method as I had with a previous Dragon Ausf J kit. As the connection point on the bracket requires additional work to get it to sit cleanly in the tubular rail cut-out, I reckoned it a whole lot easier to get a cleaner connection by attaching the brackets to the rail first. Checking as I cleaned up each bracket that it was the correct fitment to the hull, I ended up with a sub-assembly that I could test fit to both upper hull and track guard, to assure it all aligned correctly. I then dry fitted both rail and bracket assemblies, so they fully cured overnight in exactly the right position.
The spaced armour panels themselves are in photoetch with predrilled holes to align perfectly to the lower plastic brackets. Plastic is used again to represent the upper brackets. These are as thin as you could possibly expect the mouldings to be without being overly fragile. The PE panel weave pattern looks pretty accurate, and they are convincingly thin. The upper brackets attach to shallow cut-outs on the top of the mesh panel so as to align with the cut-outs on the tubular rail. Each panel is framed on the outside, represented by PE strips with bolt head detail. These then line up and are fixed to the outside framework of each panel. TBH most of the work during these steps involves cleaning up the PE strips and they are very thin and prone to bending.
The two lower plastic brackets fit through the mesh panel precut holes from behind and are fixed to PE locking strips on the outside, which is nice and simple to achieve. The last step is to add the upper rail brackets to the top of the panels.
Compared to both the Dragon and Border Ausf J kit's I built in an earlier blog, I think RFM have improved on both the engineering and the materials used for these mesh screens. Parts fitment is superb, and the scale appearance looks very convincing.
Prepping for paint


.jpg)
.jpg)


No comments:
Post a Comment