I first started this session by adding volume to the chipped areas of paintwork. To simulate the source of the original damage. Sticking within the exposed primer areas, dark scratch and scuff lines were carefully painted on with a fine brush using Vallejo acrylic black brown. Then, enamel rust effects were spotted on and then blended out with odourlous thinner. Graphite will be added to the deepest paint damaged edges to complete the look in the final steps.
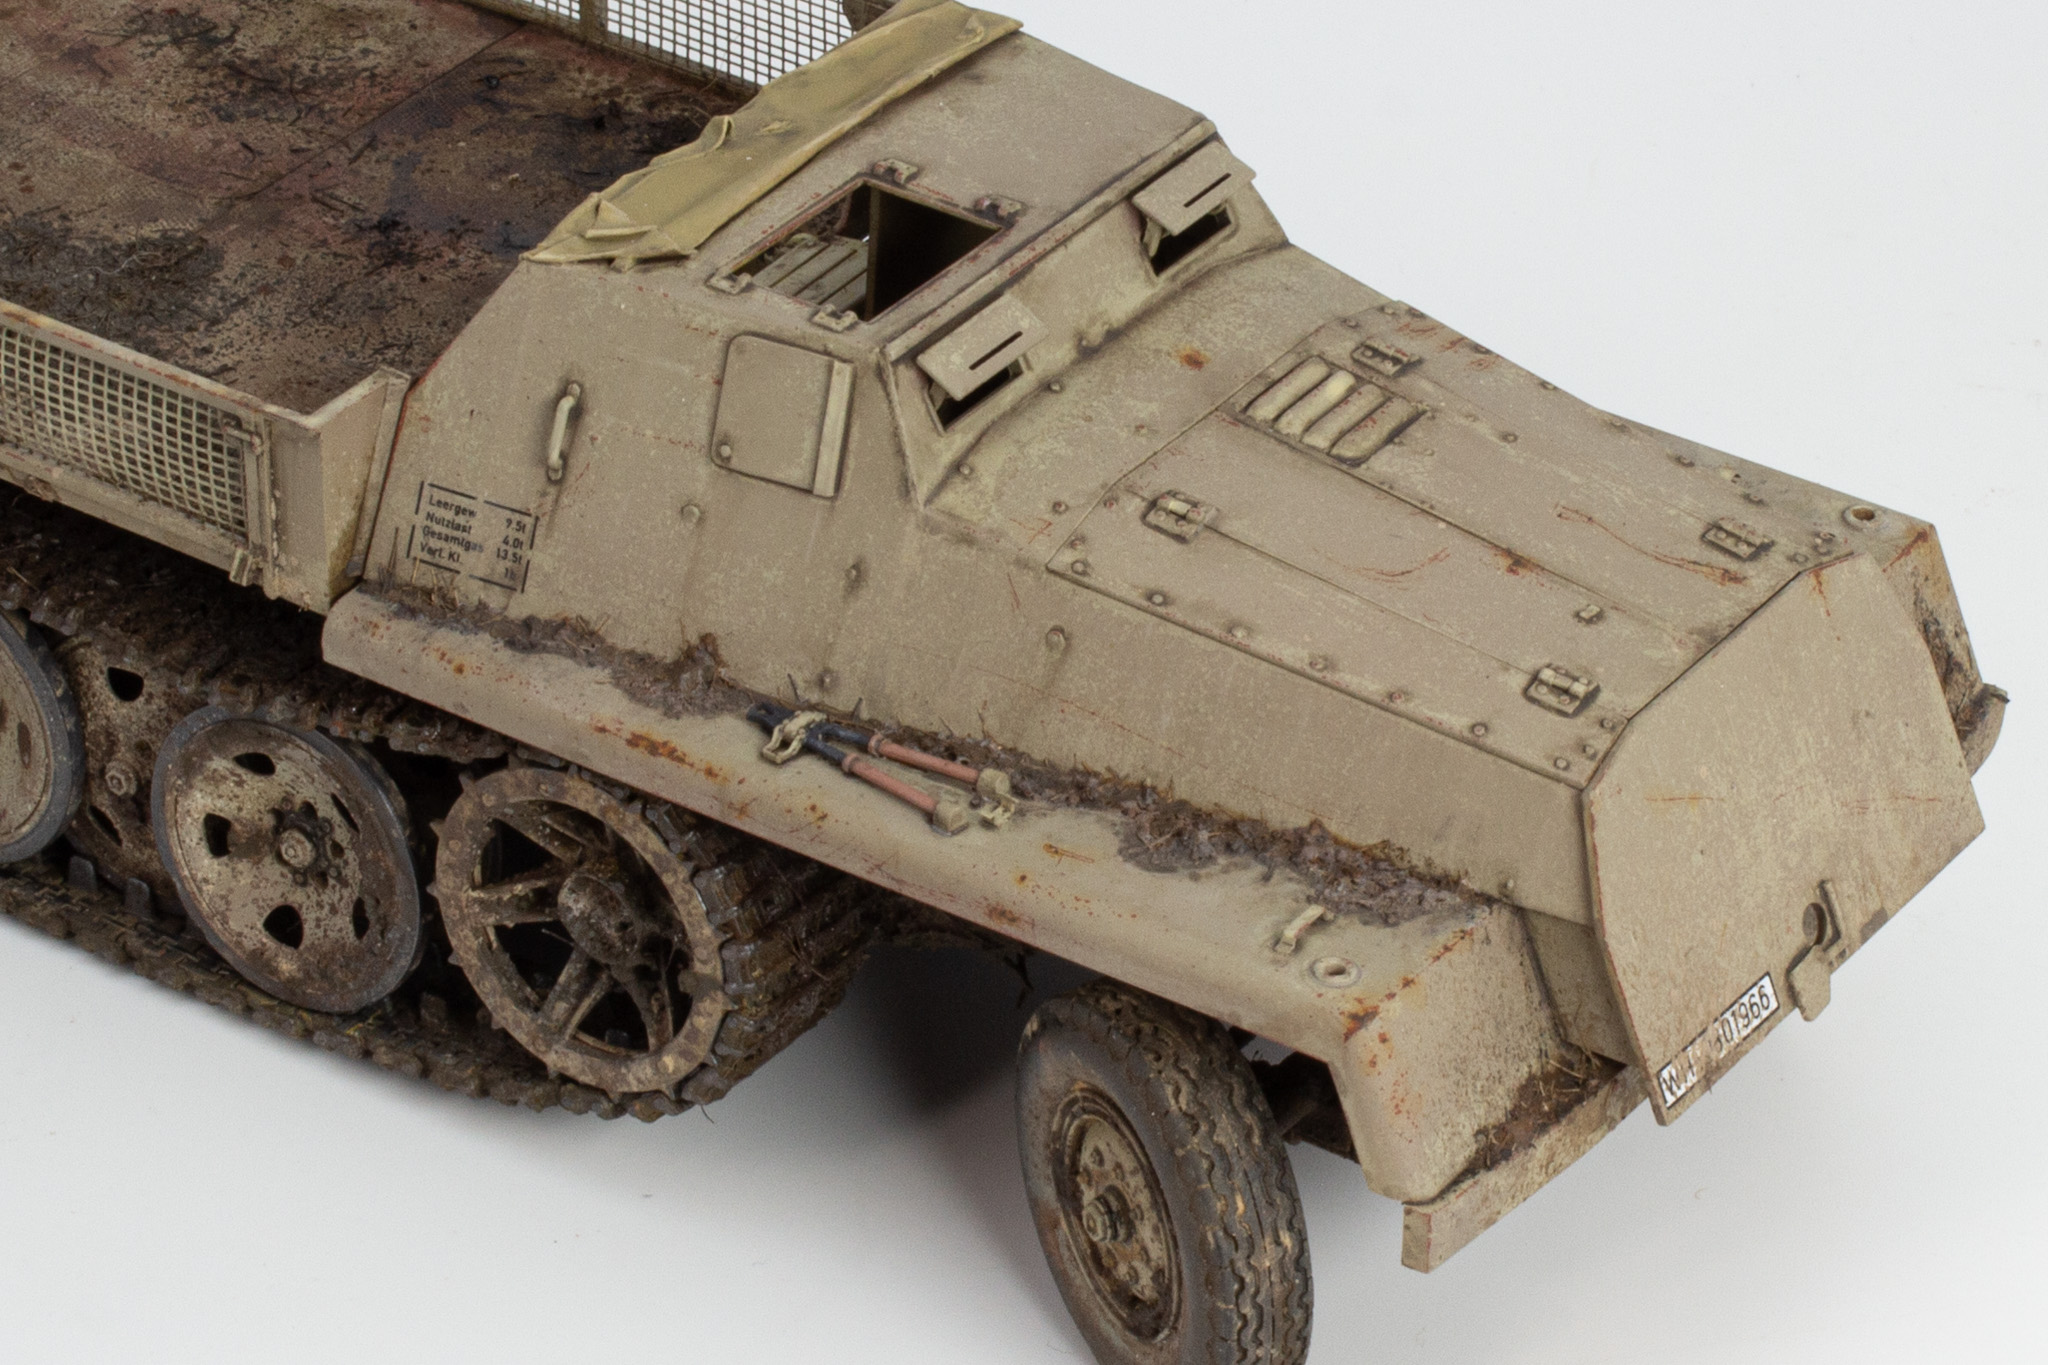
A light covering of dryer mud and general debris was then added to exposed horizontal surfaces
Debris and mud added to the top of the track guards


This drier debris mix consisting of crushed dry tea leaves, dried sea grass, and real garden dirt. It was carefully placed with a mini spatula, then VMS ballast freeze, added sparingly with a pipette, fixed it in place. Adding too much VMS product can result in glossy tide marks, but thankfully I only ended up with a few areas to address. These were effectively removed after 24hrs with a fine airbrushed coat of VMS Matt Varnish.
As this debris and mud will have dried much quicker than the thicker covering over the running gear, much to-ing and fro-ing was required to get the dried mud tone I was after

You can see in the image below the front track mud debris is yet to be finalised in tone to that of the dried mud tone on the cargo platform

Large debris and dry mud application to horizontal surfaces complete

Fixing the remaining sub-assemblies to the chassis and adding stowage has commenced. In the next chapter I will start work on the groundworks.
No comments:
Post a Comment