My intention was always to display the sWS on a small base. I had made some rough drawings before building began and had articulated the front suspension and angled the front wheels for this purpose. This was to be a simple affair displaying the vehicle abandoned in a muddy field. It would include a small section of road, a shell crater and a telegraph pole or tree and a single figure.
Sketching out the scene it became obvious that whilst the shell crater gave a little narrative as to why the vehicle had been abandoned, adding it would enlarge the size of the base more than I had first intended. To give it more interest I then raised the height of the roadway onto an embankment beyond a small ditch.
Cutting out a block of styrofaom to simulate the size of the vehicle, an appropriately sized shadow box frame was chosen, and a block of styrofoam was cut to fit in it. Some oak wood veneer was ordered, and this will be used to frame the sides. Turning to the Proxxon hot wire foam cutter again I roughly cut three more pieces, one for the triangular shaped roadway section, one for the embankment slope, and one to raise the ground beyond the ditch. These were glued in place with UHU Por adhesive, and the shell crater was then carved out in one corner.

Time to get messy.
Before I added any terrain layers, I sealed the Styrofoam surface with a few coats of diluted PVA and prepared the surface of my workbench for the mucky fall out that would ensue.
Achieving a realistic shell crater was my first goal. My reference images showed large clumps of earth that littered the edges of the crater. Although my little field will be damp and muddy I wanted to portray the ‘clumpy’ nature of the mounds of earth that had been thrown up by the impact and rained back down onto the surface.
With that intention in mind, I started experimenting with materials to find the best solution. Sculptamold is what I normally use for bulking out the main terrain layers and it is really just a dry white paper mâché mix to which you add water. For initial layers it is fine as is, but for final layers it is worthwhile adding some cheap earth toned acrylic to avoid leaving any white spots. What I did find whilst playing around was that if a slightly drier mix is used, whilst the Sculptamold is drying out, it tends to form lumpy clumps. When these are dropped from a short distance they break into smaller clumps. The paper mix does give them a fluffy texture when split but I figured they would be suitable to use around the crater if a fine layer of further texture is added.
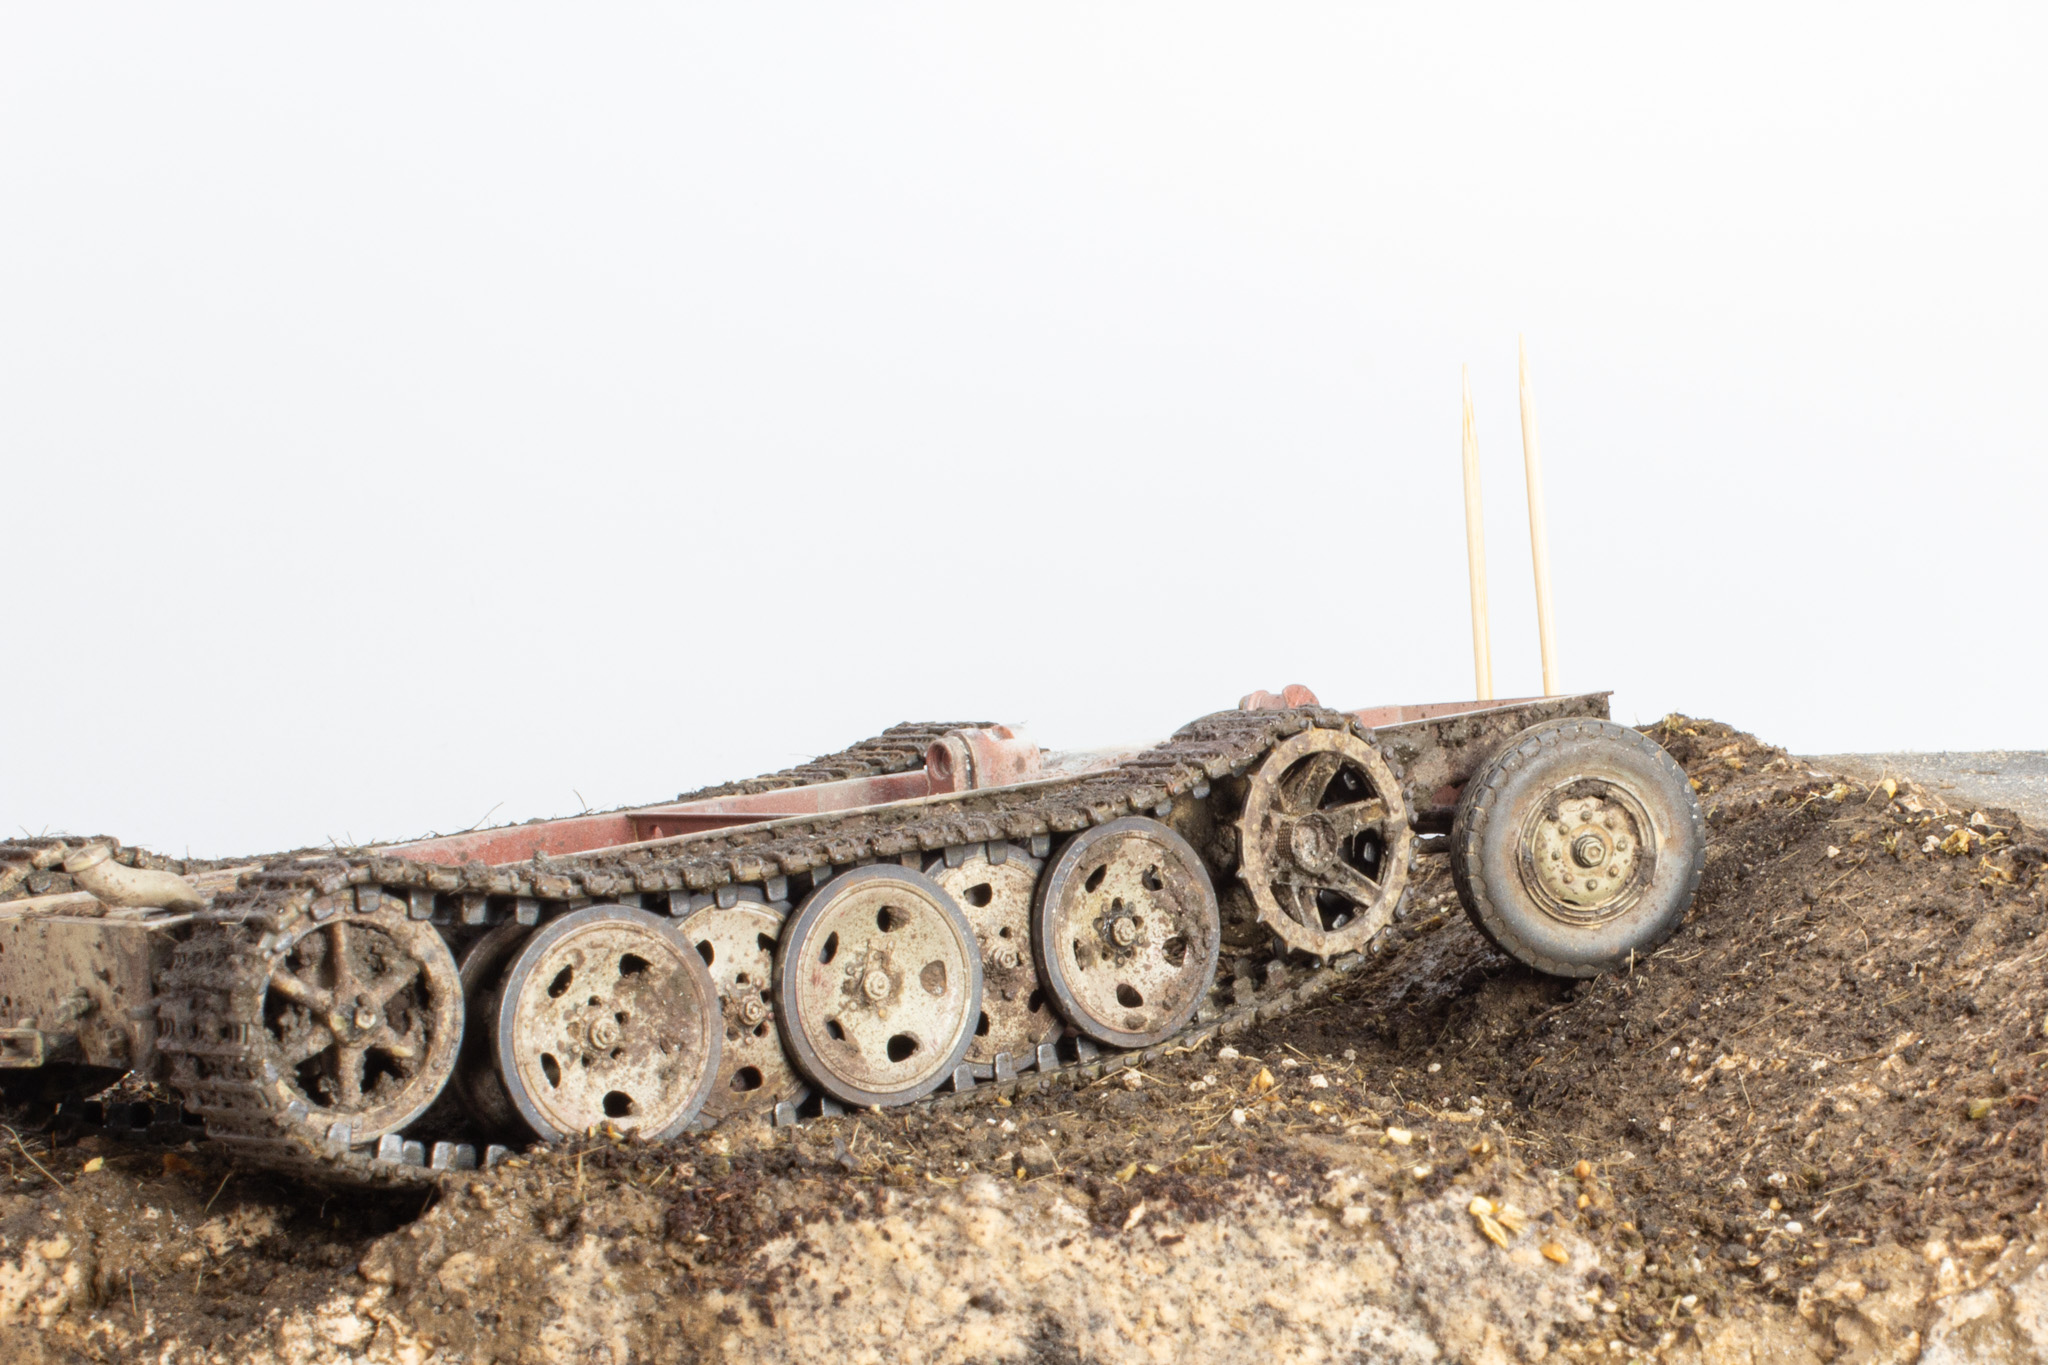
To start the ball rolling a fairly wet Sculptamold and cheap acrylic earth toned mix was made up and a first layer approximately a centimetre thick was applied with a small spatula over the Styrofoam to form the basic terrain shape. Once this was 75% dry the vehicle was carefully placed on the terrain and marked with cocktail sticks. I could then work around these areas with further wet and dry mixes without fear of disturbing the area where the vehicle would sit. It would also help in sculpting the terrain around the running gear so the vehicle would appear sunk into the earth. I would also add front wheel slip marks to show the vehicle had attempted to climb the small embankment before it was abandoned.
For the shell crater a dryer concoction of Sculptamold and AK dark mud texture paste was made up and allowed to part dry into small clumps. These were then strategically placed outside and around the shell crater. Some of them were then carefully prized apart to portray clumps that had landed and split further on impact. Whilst still full of moisture a very light sprinkling of crushed dry earth was added to the clumps and a dry mix scatter was also added over the whole area and allowed to ‘soak in’ with the aid of the PVA mix. This was then left overnight.

The second layer consisted of a Sculptamold and diluted AK Dark Mud texture paste wet mix. The AK texture paste gives a great damp mud tone and will match the tones already added to the vehicle. The dry 'scatter' mix will consist of dried tea leaves, chopped sea grass, crushed garden soil with small roots, static grass, and a few small stones. I mixed this scatter into the wet mix before applying this second layer onto the terrain.

24hrs later with the surface still damp it was perfect for trial fitting the sWS again. It was pressed gently into the surface with the tracks providing a perfectly contoured template for final placement.


This will be allowed to dry for another 24hrs before the final layer is added. This will be added with the vehicle in place so as to let mud cover the lower track run and give a better impression that the vehicle has sunk into the mud. The two cocktail sticks are to aid quick test positioning of the vehicle when required.

Chapter 12
No comments:
Post a Comment